Water is tricky stuff. No matter how good your waterproofing system is, eventually, something moist will find a way through. Even apparently solid walls are filled with tiny cracks which can let moisture through. While installing things such as water retardant membranes is never a bad idea, it’s vital to have a plan to deal with the water that does find a way in. Interior drainage systems do just that. They give what has found its way in an easy path back out, minimizing the potential damage. Let’s take a deep dive.
Understanding Basement Water Problems
Water intrusion into your basement is all too often a sad fact of life. A combination of factors makes your foundations particularly susceptible to all kinds of moisture-based issues. A good waterproofing system can help mitigate the worst of them, but ultimately what we’re aiming for is redirection.
Thanks to being located below the ground, basement floors and walls are subjected to conditions that don’t apply to the rest of your home.
The soil which surrounds them contains a certain level of water (called, unsurprisingly, ‘groundwater’). When it rains, the level of this groundwater changes, pushing against your walls with what is known as hydrostatic pressure. Sometimes this will push the water through tiny (or not so tiny) cracks and into your home.
Exacerbating factors to this hydrostatic pressure include issues like poor drainage or grading. Either of these can result in water flowing against your walls rather than away from them. If there’s no path with less resistance for it to follow, water will find a way through.
Add poor levels of ventilation and condensation in the environment, and an unprotected basement quickly becomes a dank pit.
Common Water Issues In Basements
These facts make basements particularly susceptible to issues with water intrusion. Leaks, flooding, mold and mildew, the list goes on and on. Not only do these problems turn your basement into an unpleasant and unsightly space, they can have some other pretty serious effects.
- Structural Damage: including collapse in very extreme circumstances
- Health Risks: respiratory problems and allergies are particularly common
- Decreased Home Value: Some reports suggest that an unwaterproofed basement can knock as much as 25% off your home.
What Is An Interior Basement Drainage System?
As the name might suggest to those who are paying attention, an interior basement drainage system does what the name suggests. Put simply, it’s a collection of measures which aims to allow the water that does find a way in, a way out again.
Also known as French drains, interior perimeter drains, and drain tiles these systems divert the water to your sump pump where it can be harmlessly pushed away and out of your home.
Components Of An Interior Drainage System
An interior basement drainage system involves installing an interior drainpipe in a trench filled with crushed stone which diverts water to a sump pump. The water is then pumped out of the home through the discharge line and away from your basement.
The components of an interior basement drainage system includes:
- A Perforated Drainpipe
- A trench with crushed stone or gravel
- A Sump Pump
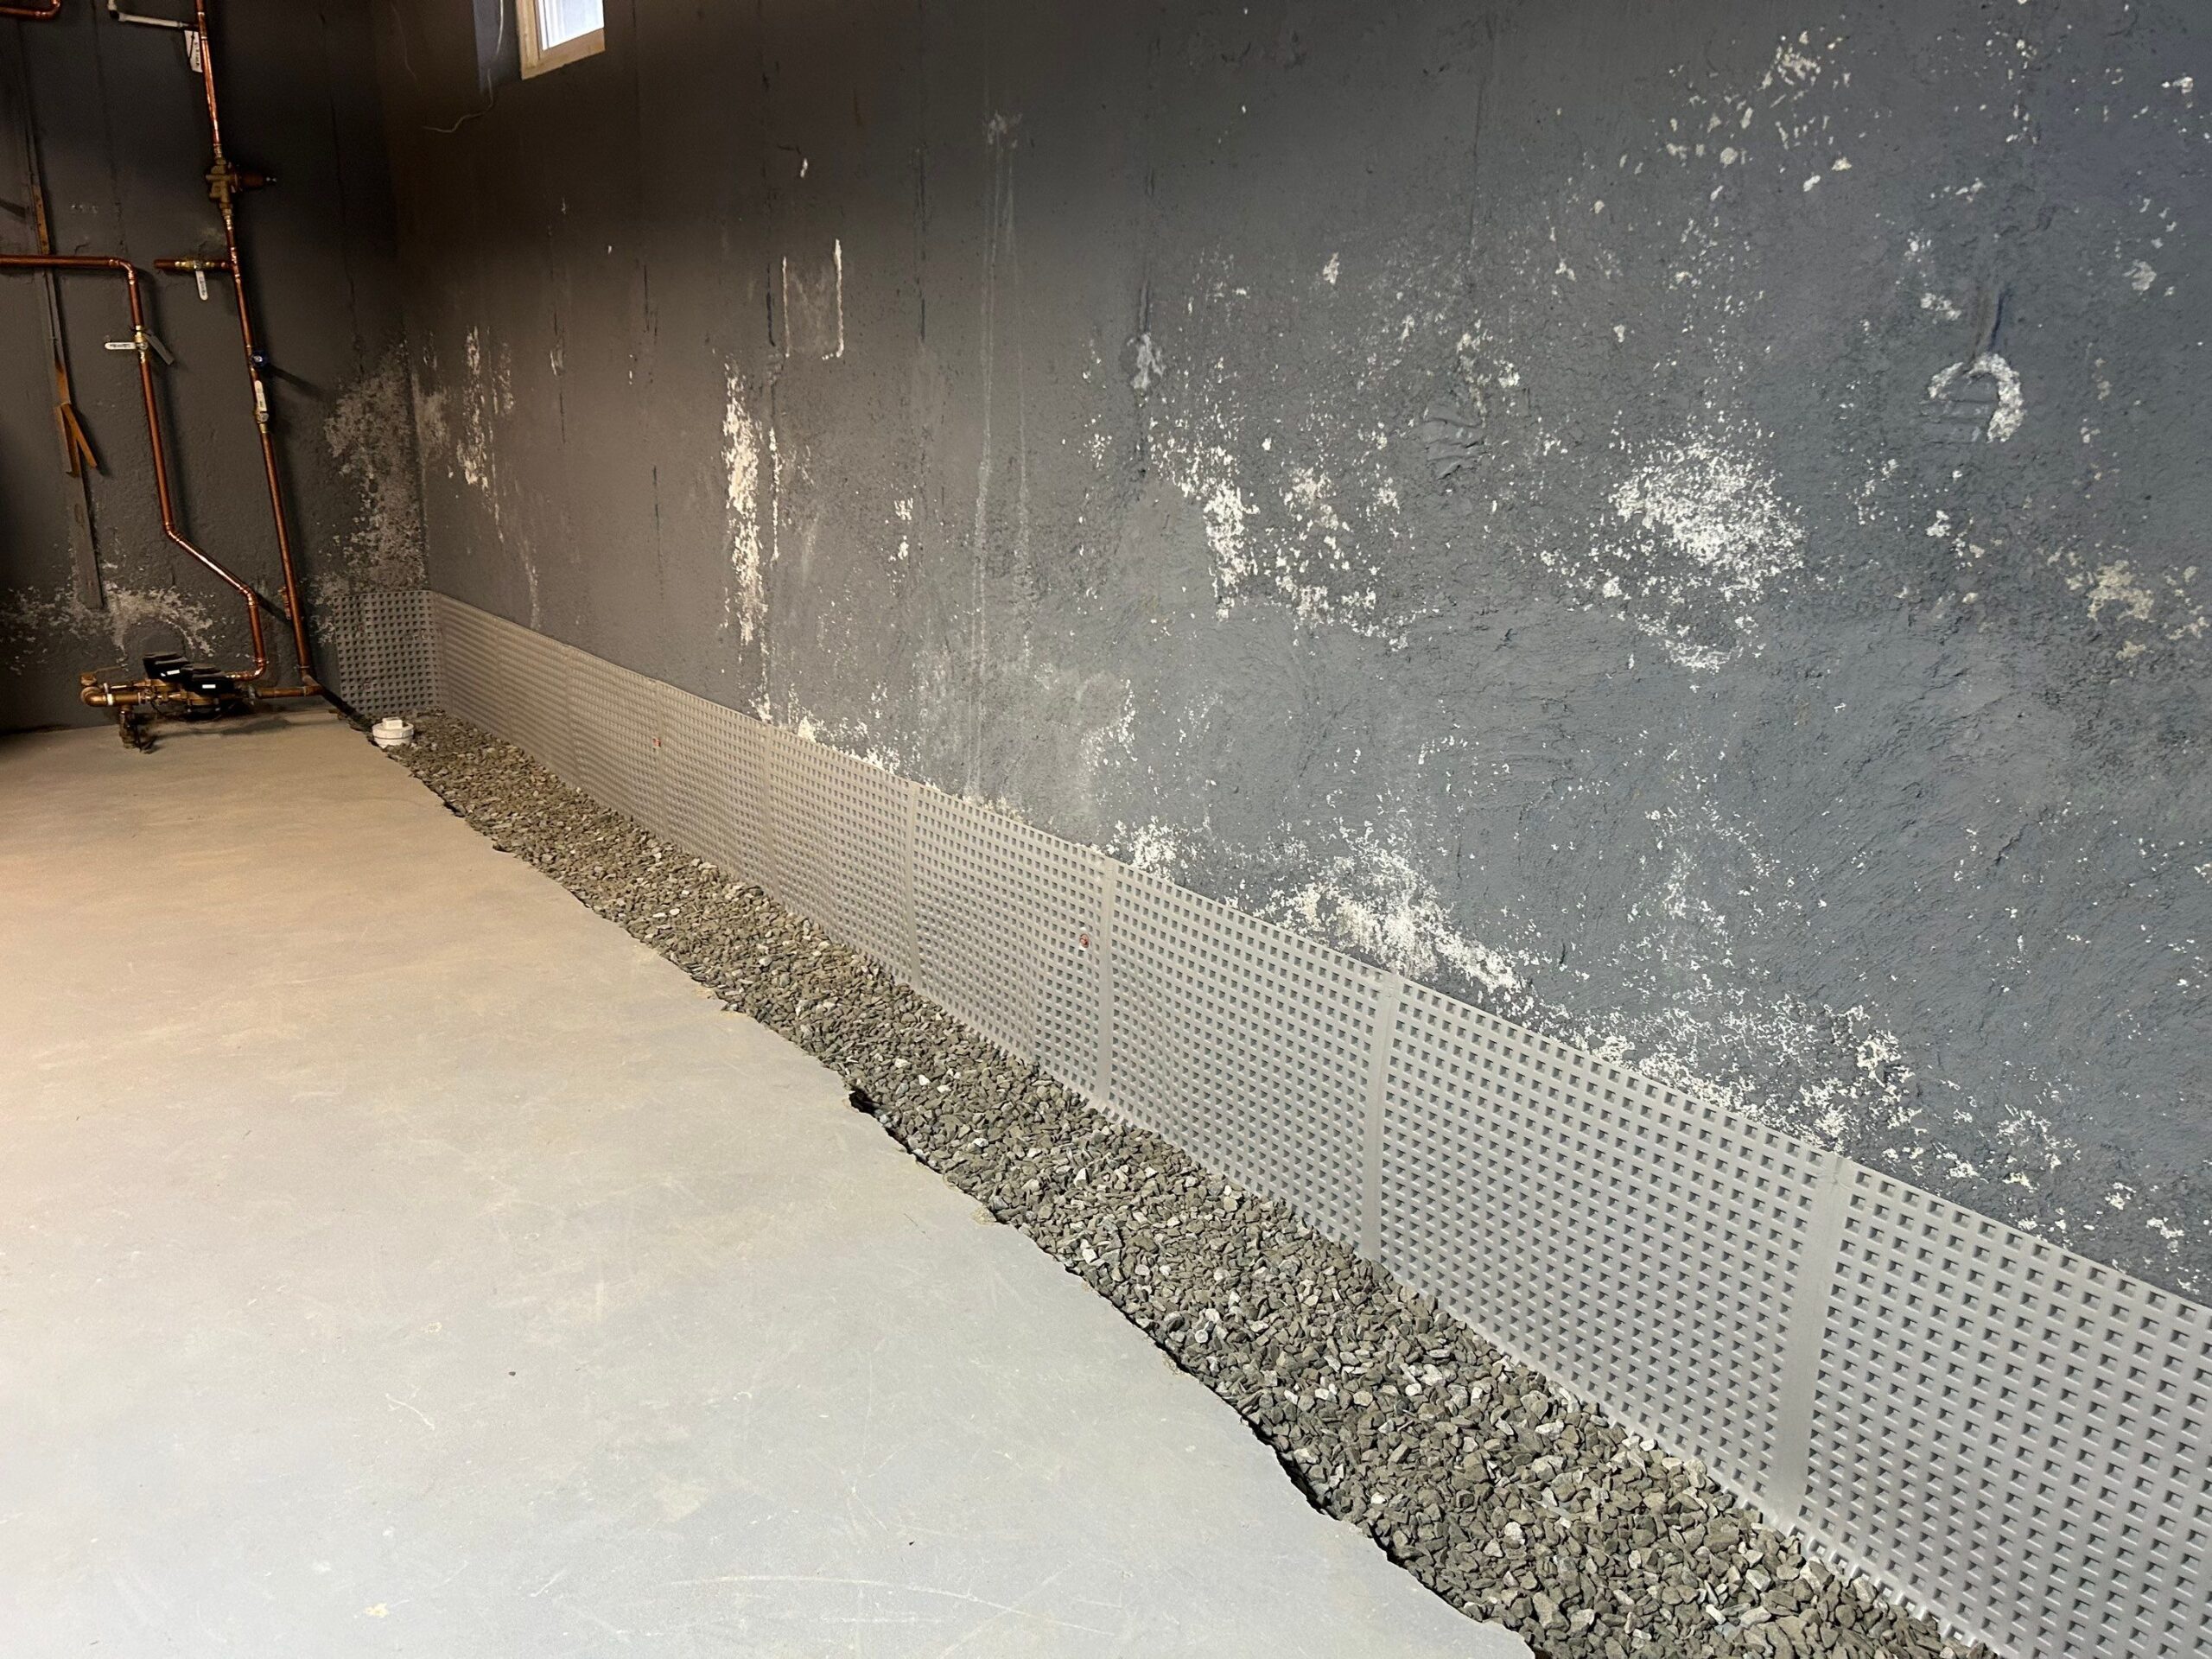
- Cove Diverters
How Does An Interior Basement Drainage System Work?
All of these components work together in concert for one goal: getting water that’s found its way in back out. Each element plays its own role which can be roughly broken into the following three headings:
1. Water Collection
The first step is obvious: water must be brought into the interior basement waterproofing system in the first place. The main function of an interior basement drainage system is to capture ground water rising under your slab. As the water level rises it finds it’s way into the trench of crushed stone and eventually into the drainpipes, where it’s directed to the sump.
The other way water might find its way into the system is through the cove diverter. This is a membrane attached to the wall and laid under the concrete inside your drainage trench. The purpose of this dimple board is to capture water that may run down the walls and send it into the trench where it will travel the same path as groundwater.
2. Water Redirection
While we may talk of basement waterproofing, what we’re usually referring to is actually better termed “water redirection”. Water will generally follow the path of least resistance and our job is to decide what that path is.
In the case of an interior basement drainage system, this is through means of a drainpipe. The perforated drainpipe sits within the trench and allows water in through small holes located at the bottom of the pipe. Once inside, the pitch of the pipe will carry the water to your sump pump.
3. Water Removal
Once water is flowing nicely down your interior drainage system, you have to find a way to conduct it safely out of your home. This is where your sump pump comes in. A sump pump sits in a pit below your basement floor. When this pit (the ‘sump’) fills to a certain level, the pump is activated by means of a float switch. This turns on an impellor which creates an area of negative pressure and forces water from the sump out of the discharge line.
Benefits of An Interior Drainage System
Installing an interior basement drainage system has many benefits.
Firstly, if you’re dealing with water coming up from below or excessive hydrostatic pressure on your walls forcing water through, an interior system is the only real solution. This can avoid water damage and is much more effective than less dramatic interventions.
If you live in an area prone to ‘false water tables’, they also provide this extra water with a safe outlet. This reduces the amount of water which pushes against your foundation walls. In turn, this reduces the pressure and the amount that finds its way in.
As with any waterproofing measure, an interior basement drainage system will help improve indoor air quality. By helping create a less humid environment, you make your basement space less habitable for molds and mildew. Not only is this good for your home’s air quality, but it’s also great for transforming your basement into a dry storage area or additional liveable space.
Installing an interior drainage system in your basement has one other huge advantage over other options: it’s a lot cheaper. When compared to exterior work, it’s quicker, less disruptive and far more cost effective.
Installation Process
The installation process for an interior drainage system is relatively straightforward:
1. Assessment of the Basement:
Your installers will visit the site and see what the situation looks like. They’ll take measurements and give you a quote. This is a good time to ask any questions.
2. Preparation:
The basement will need to be empty before work can start. You can save a bit by moving things out before the work start. Time spent moving boxes is time not spent digging.
3. Excavation:
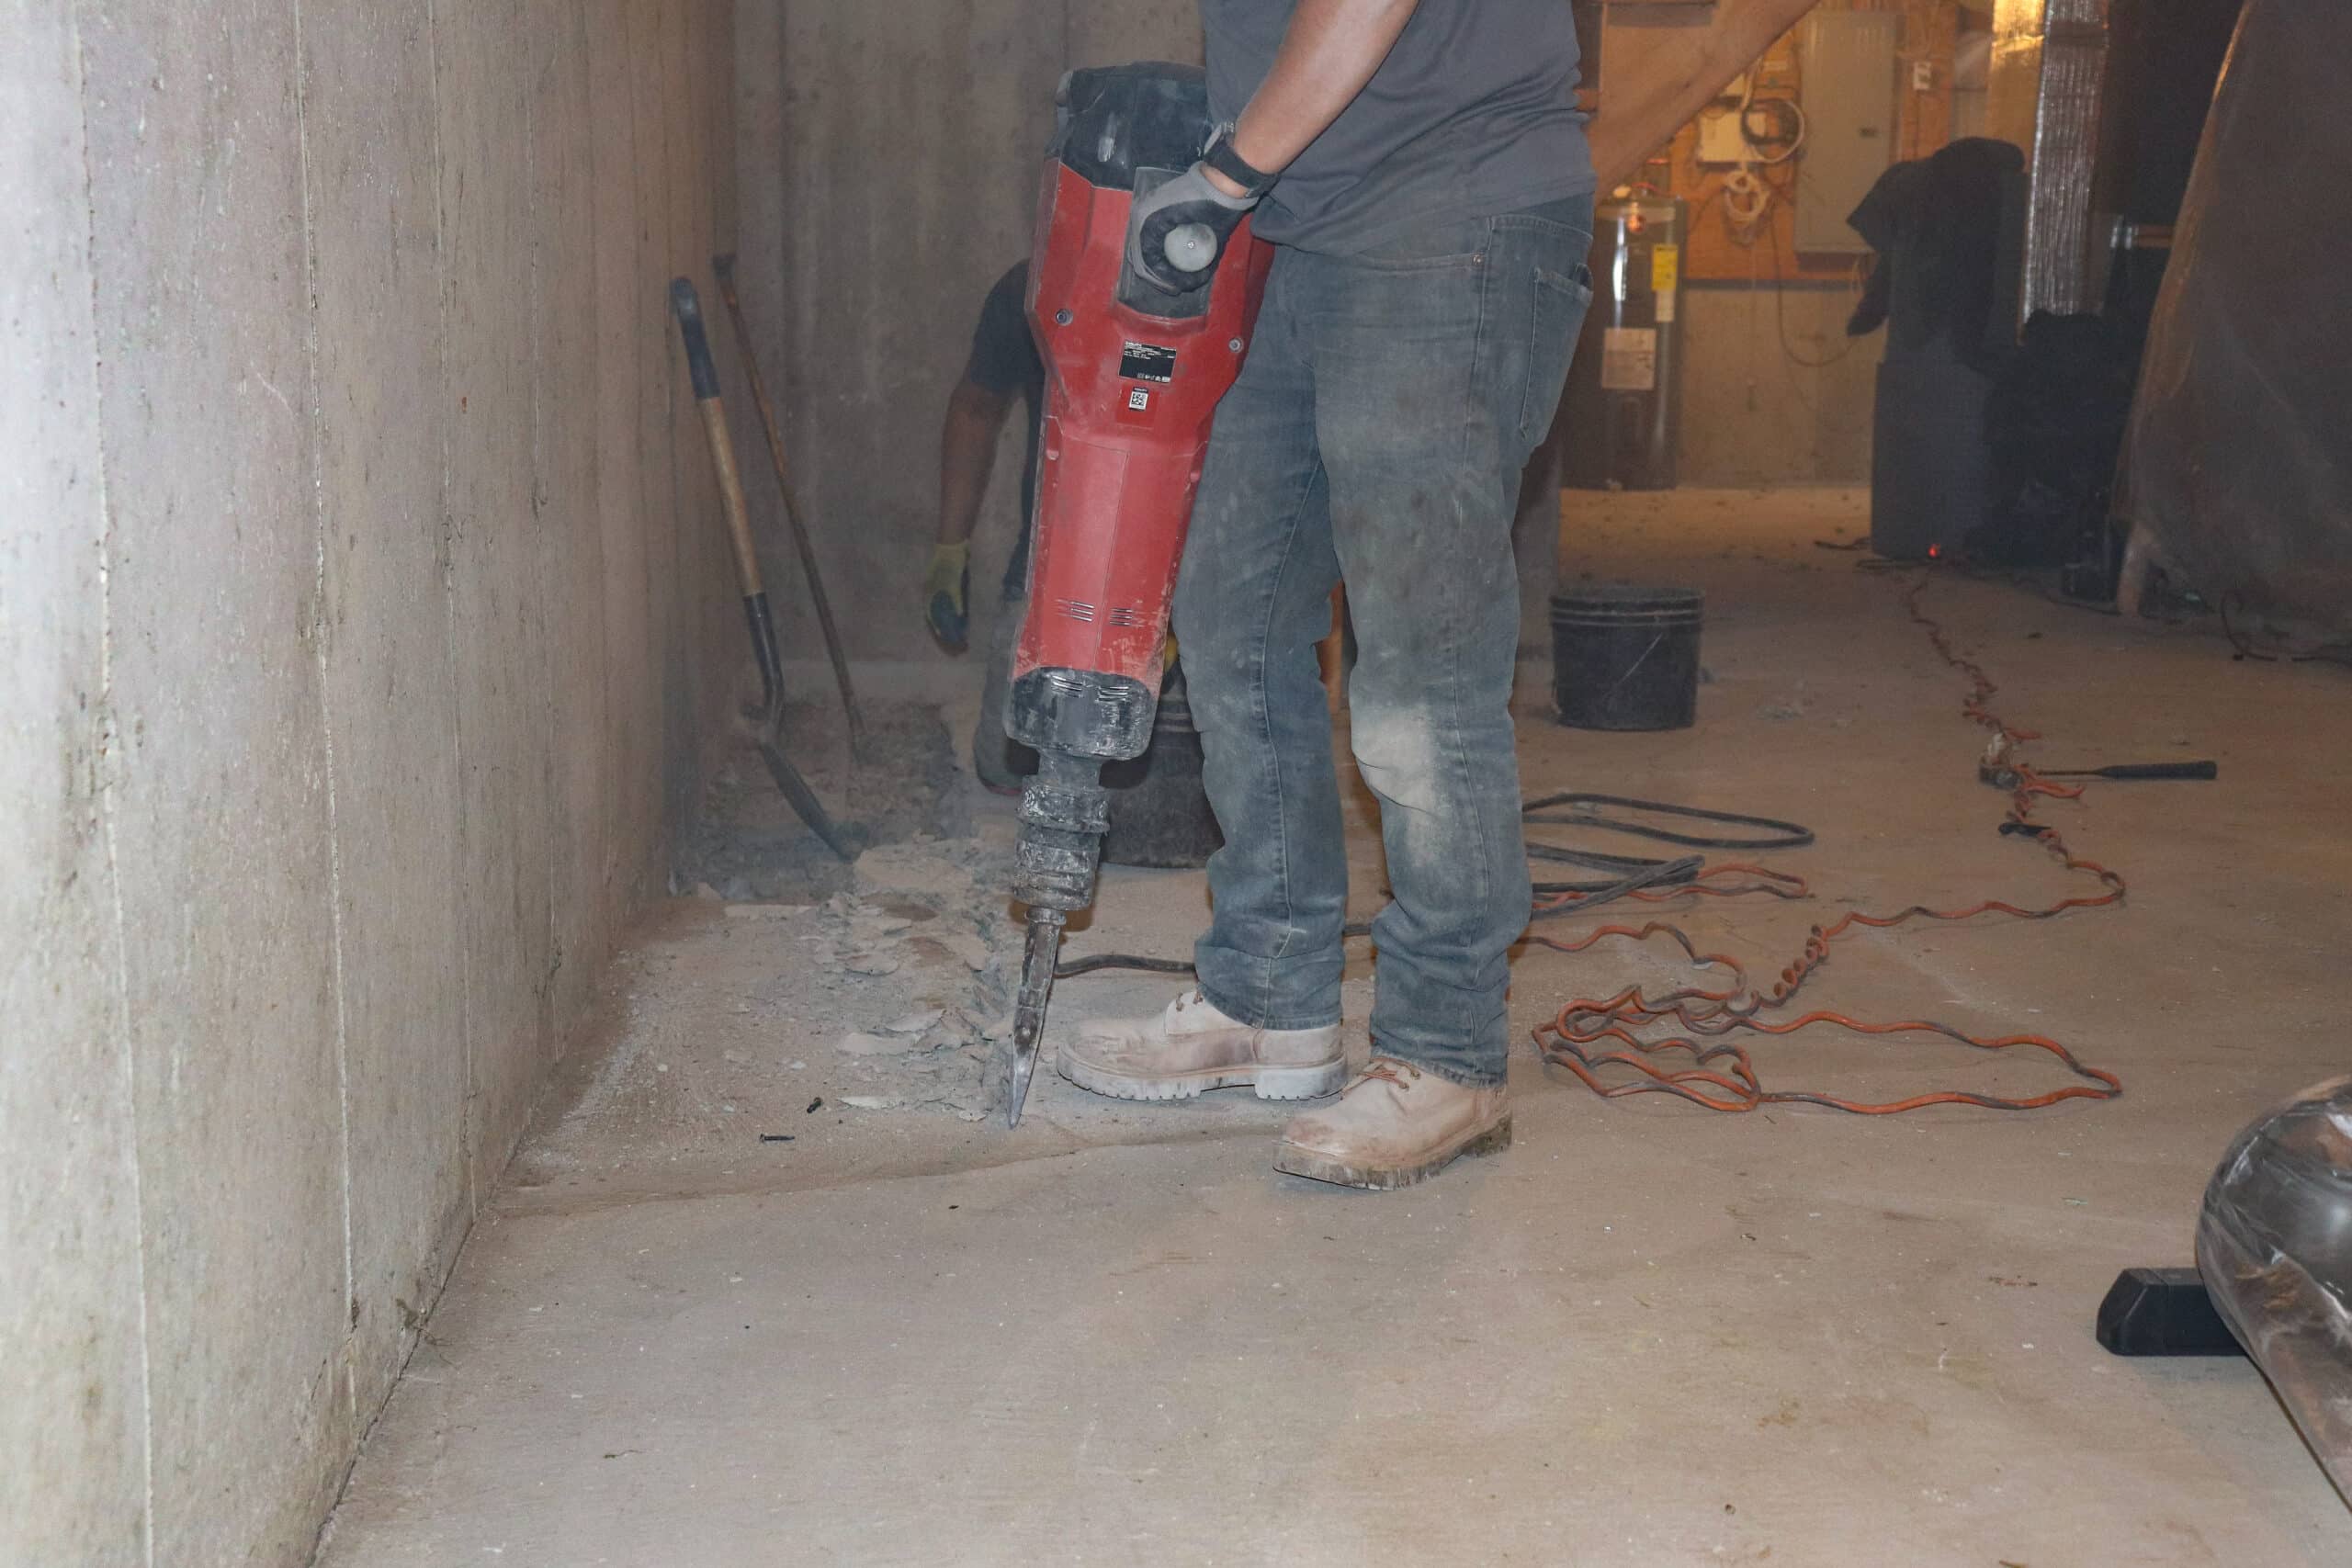
Once the space is clear, a trench will be dug around the edge of your basement wall to allow installation of the drainage system. This stage is messy, noisy and certainly the most disruptive, but your installers should tidy up after themselves.
4. Installation:
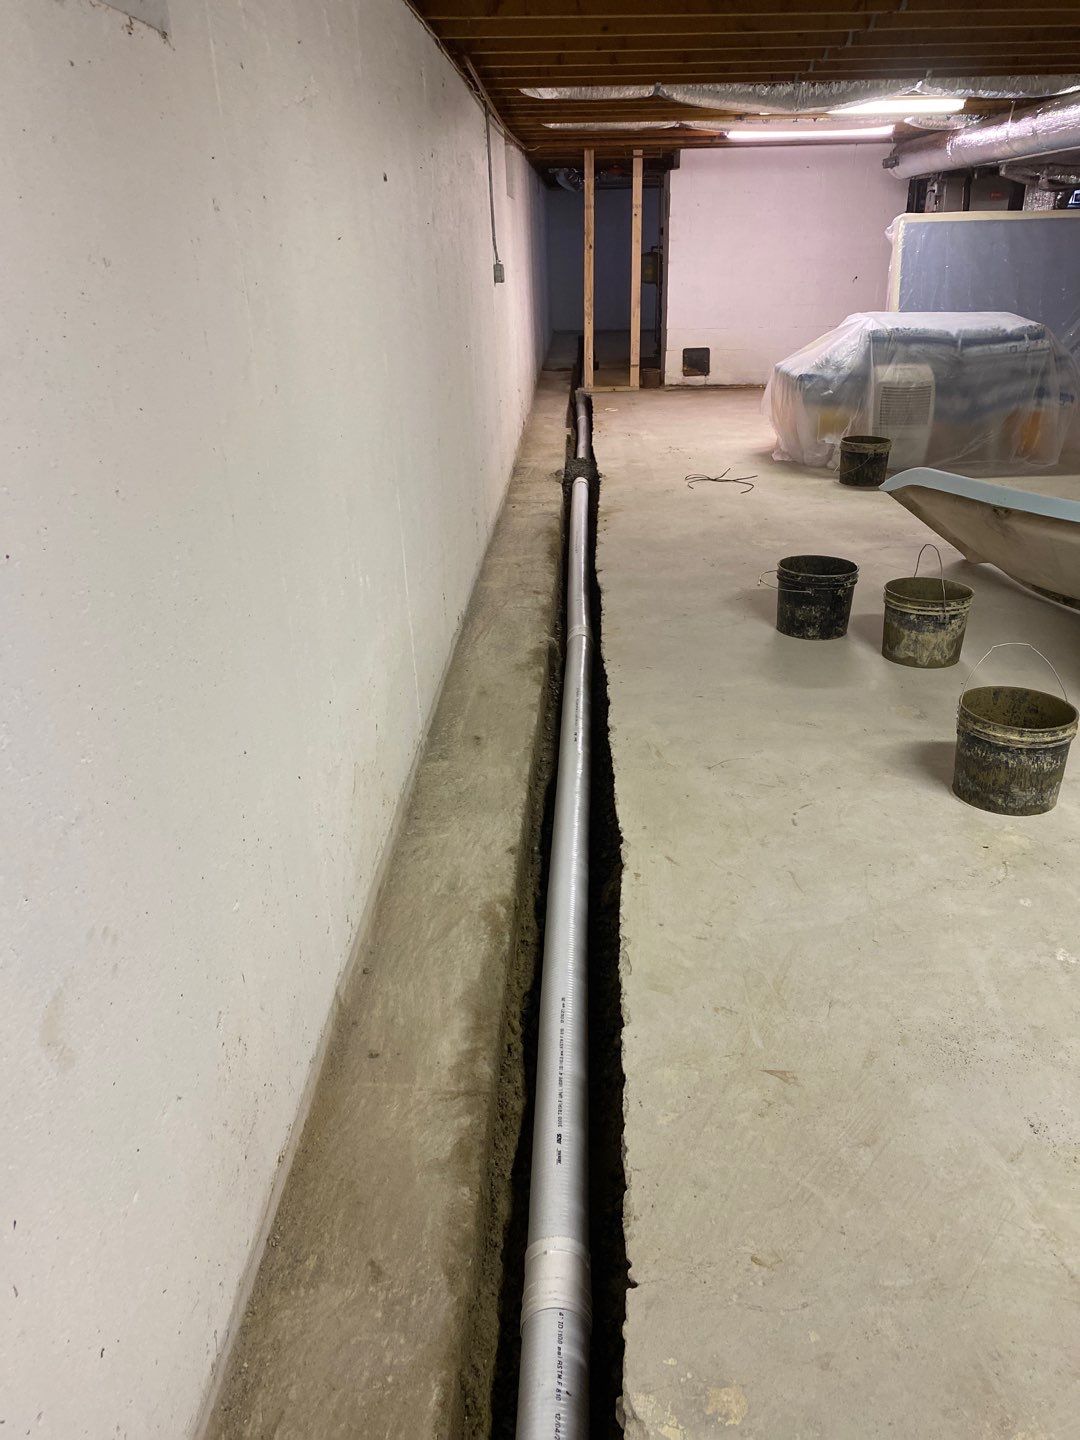
Once the excavation is complete, the drainpipes, cove diverters, crushed stone and sump pit are put in place.
5. Repouring Concrete:
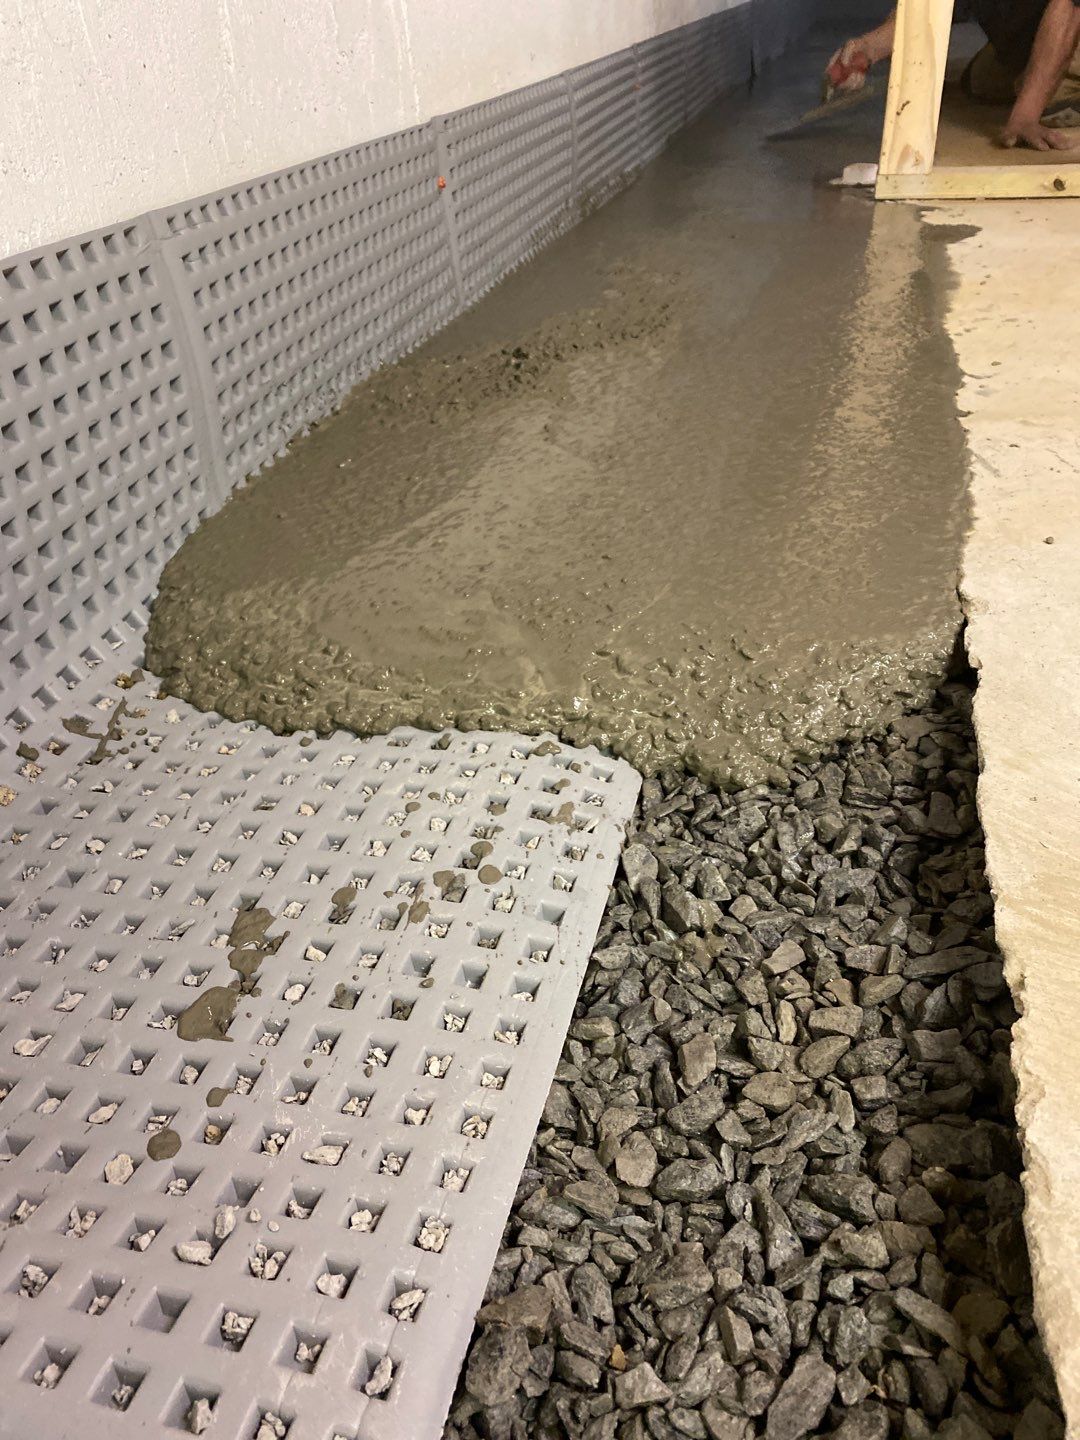
Once everything is in place, it’s time to put things back how they were. The trench will be covered up with concrete and finished off, giving you your basement back but drier.
Needless to say, this is a task for the pros. Digging against the edges of your foundation can have some pretty serious effects in terms of structural stability. If something goes wrong, professionals will be best placed to mitigate it and are less likely to cause problems in the first place.
Maintenance Tips
Once installation is complete, the next task is making sure it all remains working.
Regularly testing the sump pump by pouring a bucket of water in to its pit will give peace of mind that everything is working correctly. It’s a good idea to try this a few times a year and at the first sign of anything not working, get it repaired.
It’s also worth checking that there are no blockages along the length of the system. If there are, access points should allow you (or a professional) to snake the pipes fairly easily.
Schedule a regular inspection, ideally annually, and you’ll be best placed to head-off any problems before they become an issue.