Exterior Waterproofing
There are several situations where exterior foundation waterproofing is the preferred solution. If you have a finished basement that needs protection from water intrusion but want to avoid interior demolition, working from the outside can be the most effective approach. Exterior waterproofing is also a common choice for older homes, particularly those with fieldstone or cinder block foundations, where moisture is entering through porous walls or deteriorating mortar joints.
In this guide, we’ll walk through each step of the exterior waterproofing process, what it involves, when it’s used, and how it helps protect your home from long-term water damage. Whether you’re evaluating repair options or simply trying to understand how waterproofing works, this walkthrough will give you a clear, practical overview.
Step 1: Excavate the Soil Around the Perimeter of your Foundation

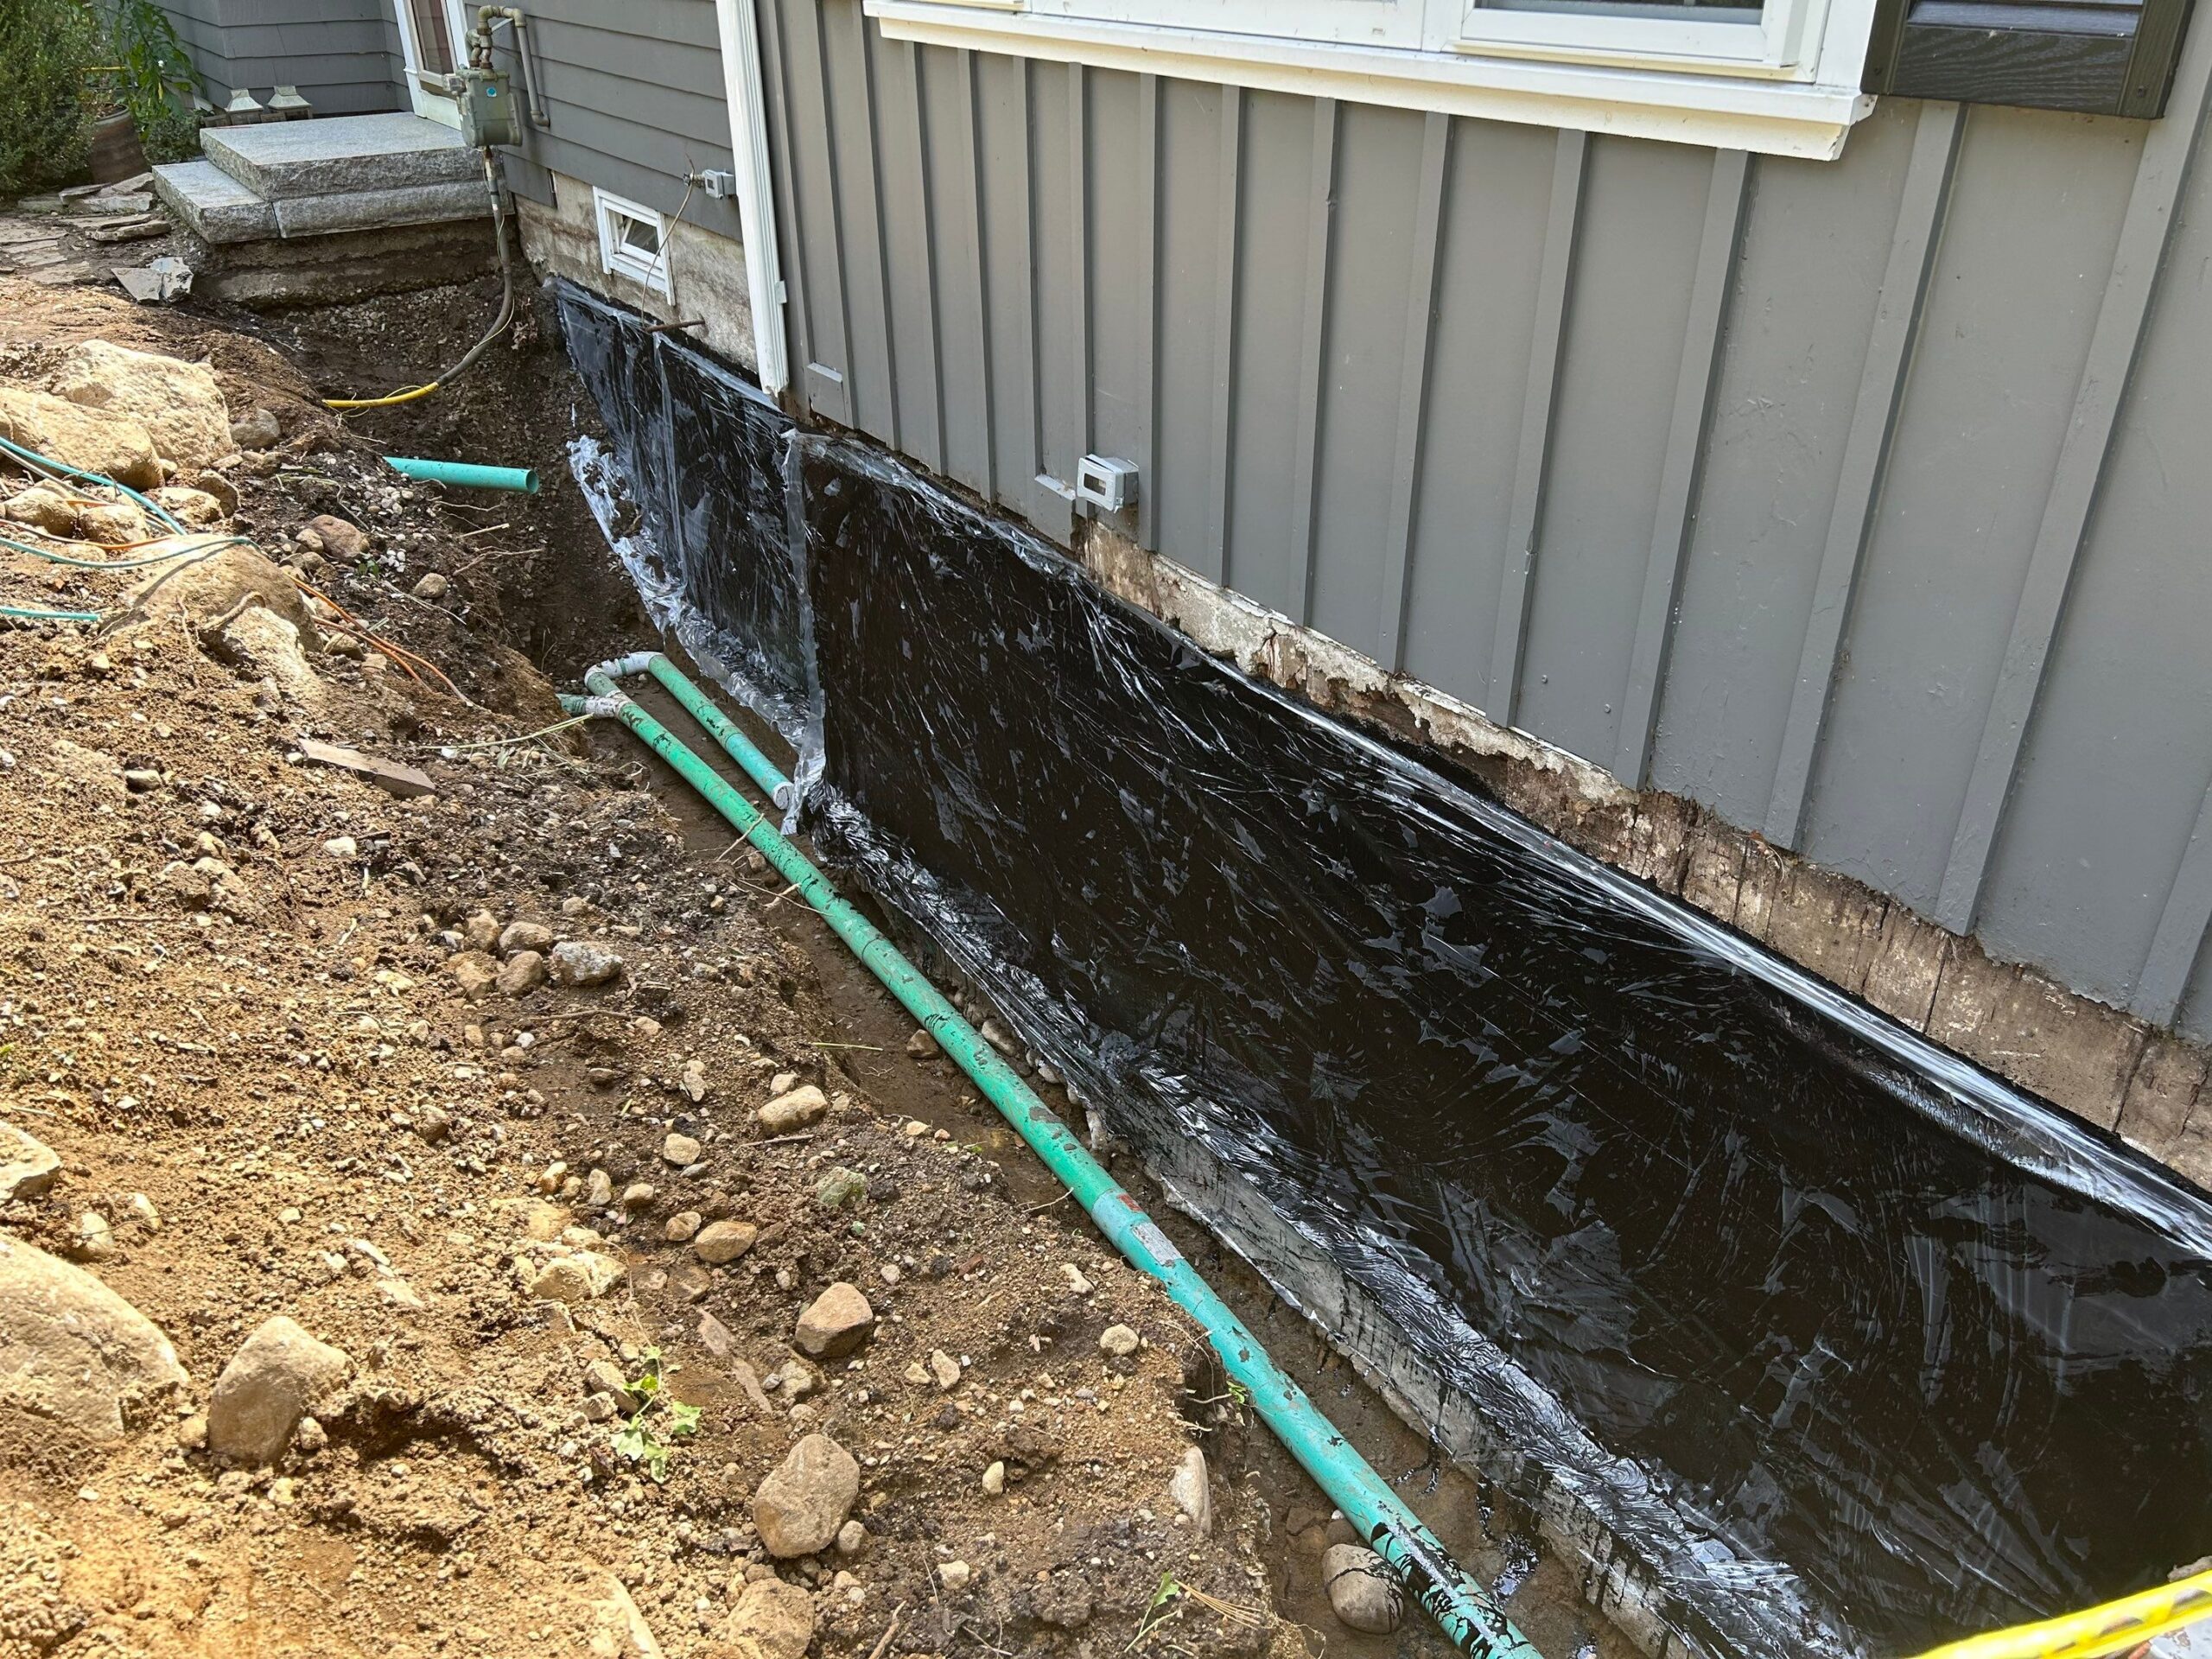
The first step in exterior foundation waterproofing is to excavate the soil surrounding the foundation walls. This creates access to the surface where waterproofing materials will be applied. Depending on factors like site access, soil conditions, weather, and overall project scope, excavation may be done in sections or completed all at once.
For proper waterproofing, it’s essential to expose the entire foundation wall down to the base of the footing. This ensures that water can be redirected away from the structure at its lowest point.
Step 2: Clean and Prep Your Foundation Walls
Step 2: Clean and Prep Your Foundation Walls
Once the foundation walls are fully exposed, the next step is to clean and prepare them for waterproofing. This step is critical to the overall success of the project, as proper preparation ensures that the waterproofing materials will bond correctly and last over time.
Cleaning serves two important purposes:
Adhesion: Waterproofing products require a clean, debris-free surface to bond properly. Removing soil, dust, and any loose material from the foundation wall allows for strong, uniform adhesion.
Inspection: A clean surface makes it easier to identify cracks, voids, or other signs of damage that may need repair before waterproofing begins. Catching these issues early helps prevent future water intrusion and ensures the system works as intended.
Step 3: Fix Damage to Your Foundation Walls

Before applying waterproofing materials, it’s important to repair any damage to the foundation walls. The specific repair process will depend on the type of foundation your home has.
Fieldstone or Cinder Block Foundations:
In many older New England homes, fieldstone foundations remain a common feature. These, along with cinder block walls, require special attention because the mortar joints can break down over time. Once the surface is clean, the next step is to repoint the foundation, which means reapplying mortar between the stones or blocks to restore structural integrity. For fieldstone walls, additional patching may be necessary to fill voids and create a smoother surface for the waterproofing system to adhere to.
Poured Concrete Foundations:
If your home has a poured concrete foundation, any visible cracks, honeycombing, or surface defects should be repaired before moving forward. These imperfections can expand over time, especially in regions that experience freeze-thaw conditions. Addressing them early ensures a more durable and reliable waterproofing result.
Step 4: Apply a Waterproofing Membrane to the Outside of the Foundation
After the foundation surface is fully cleaned and repaired, a waterproofing membrane is installed along the exterior wall. This membrane forms the first line of defense between the soil and your home’s foundation, helping to block moisture from reaching the interior. Depending on the home’s construction and site conditions, the membrane may be a liquid-applied coating, a sheet membrane, a dimple board, or a combination of systems layered for added protection.
This step is critical because concrete and masonry materials are naturally porous. When saturated soil presses against your foundation, moisture can gradually seep through, even if there are no visible cracks. Over time, this can lead to increased humidity, musty odors, or damp spots inside your basement. A properly installed membrane prevents that moisture from being absorbed in the first place, supporting a dry, stable, and protected foundation.
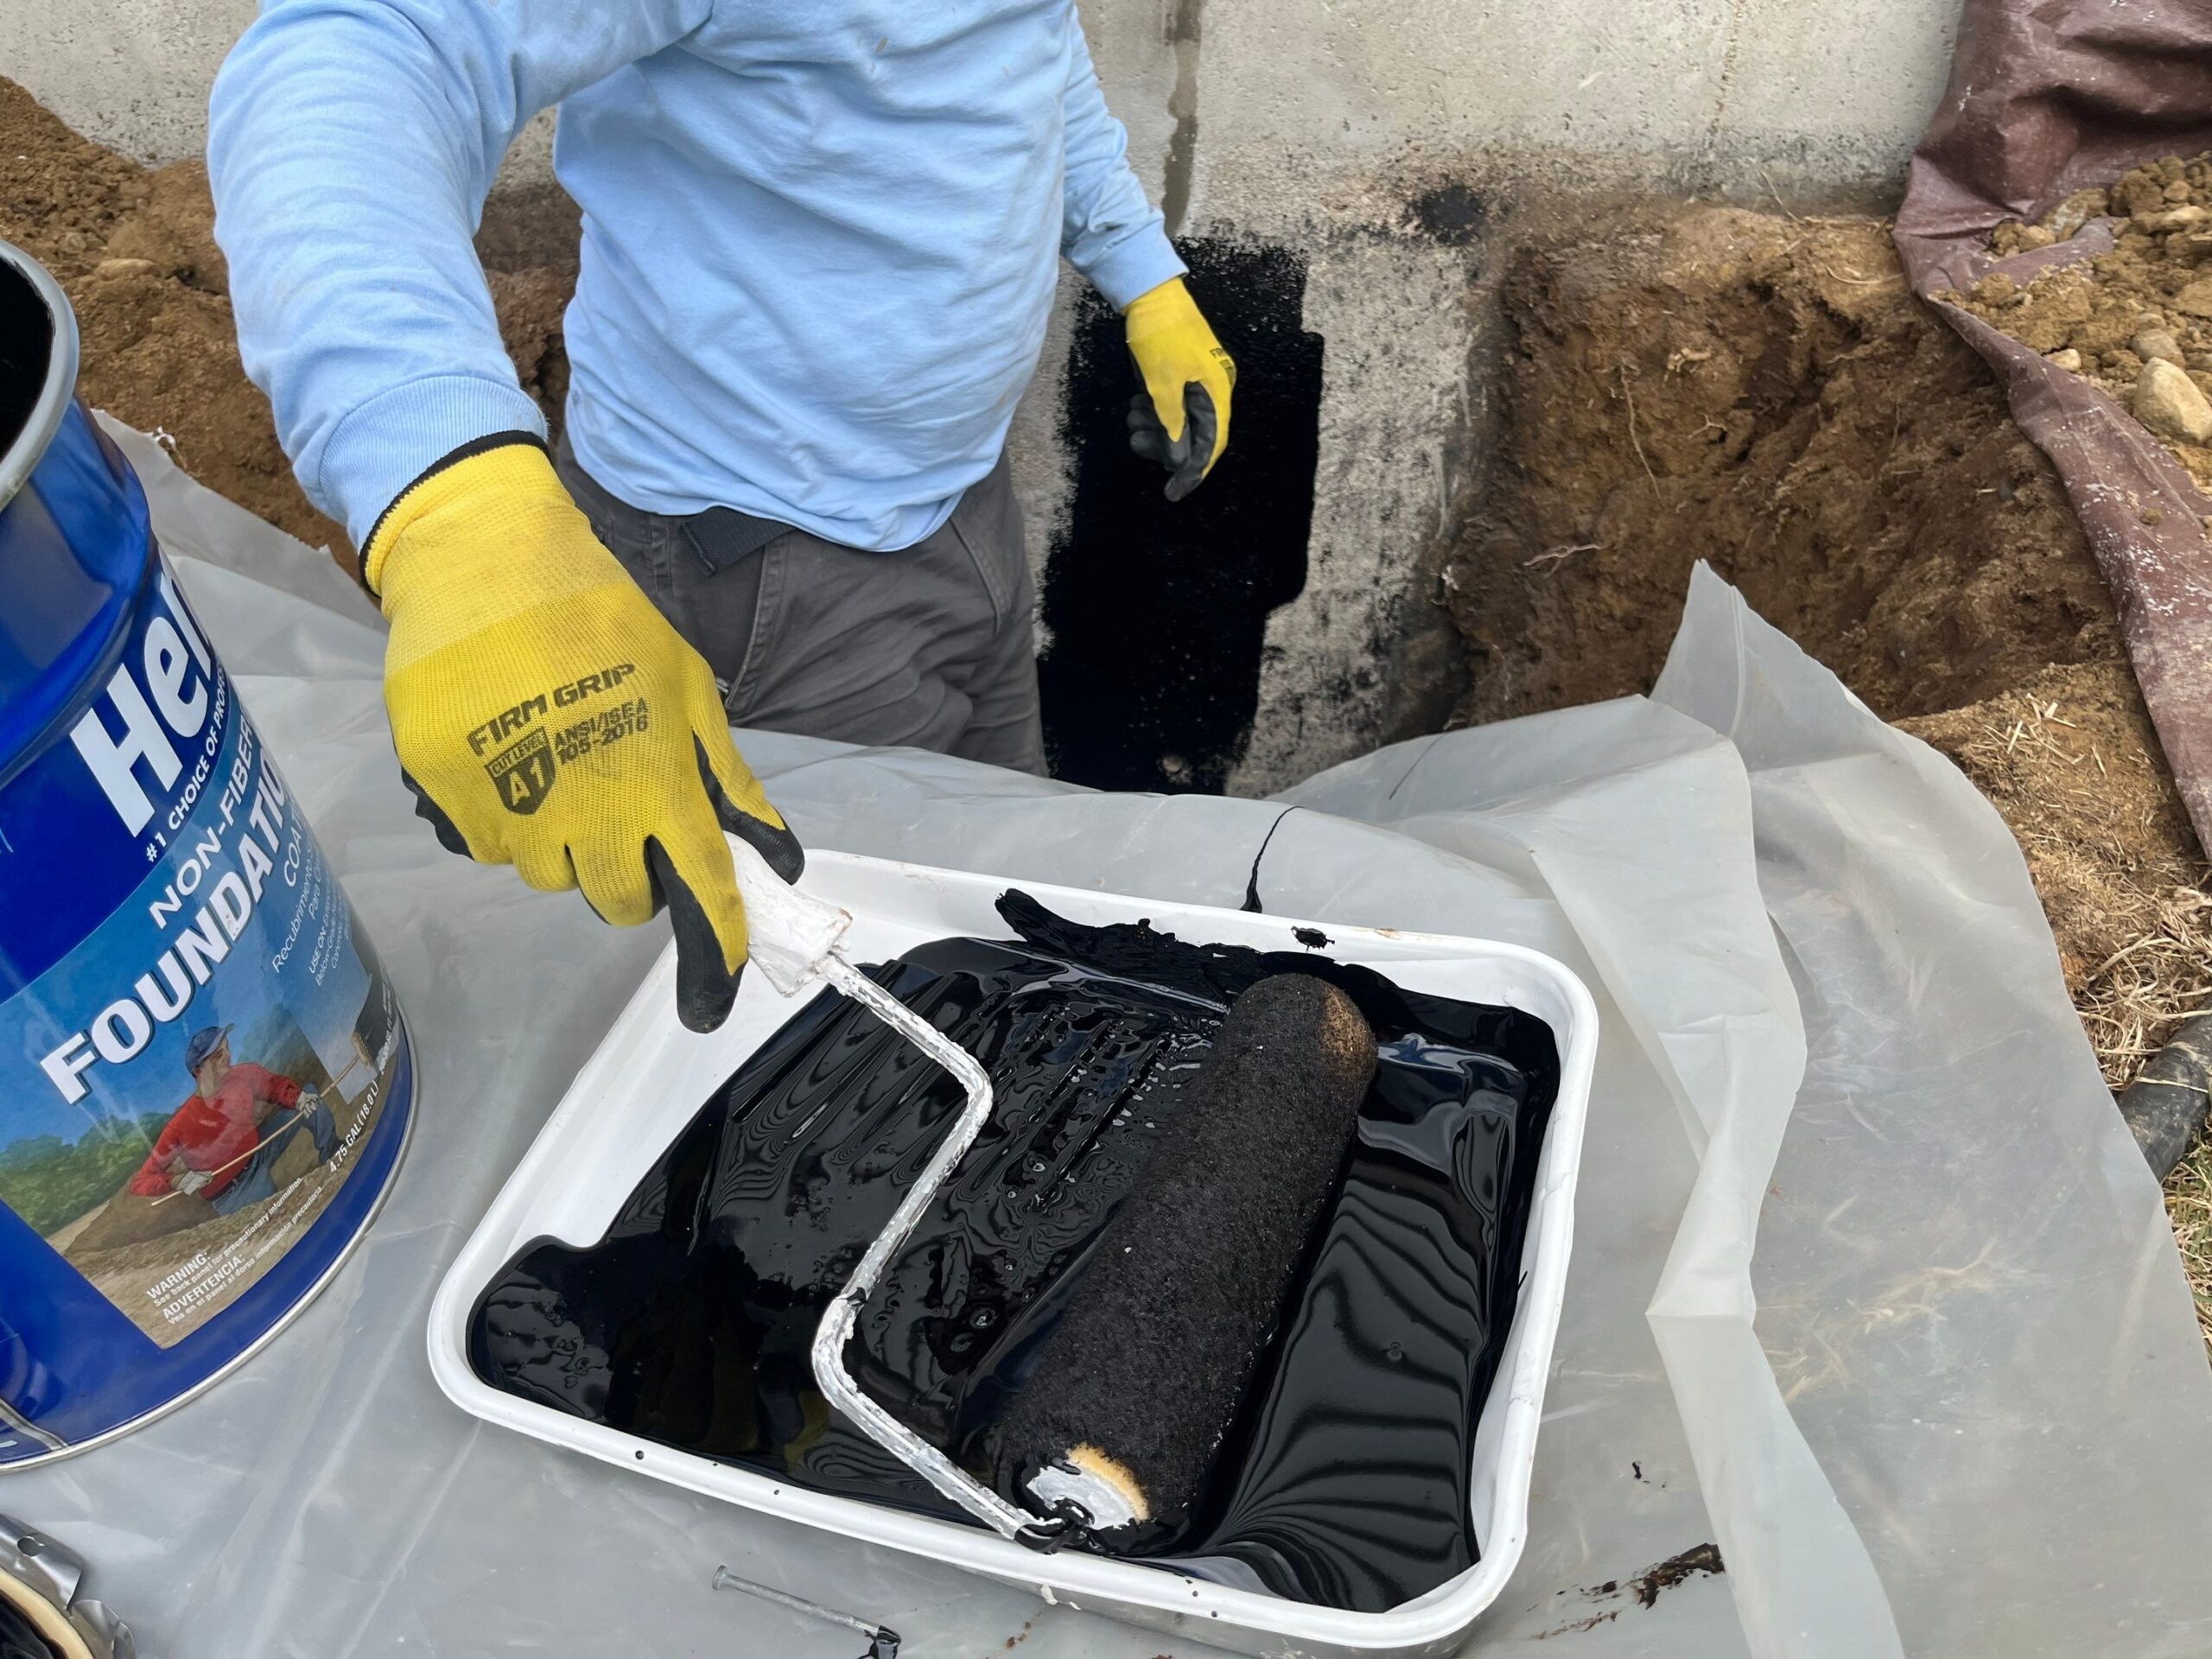
A liquid applied waterproofing membrane is designed to create a barrier between the moist soil and your concrete foundation. This stops the wicking effect and prevents moisture related damage to your foundation walls.
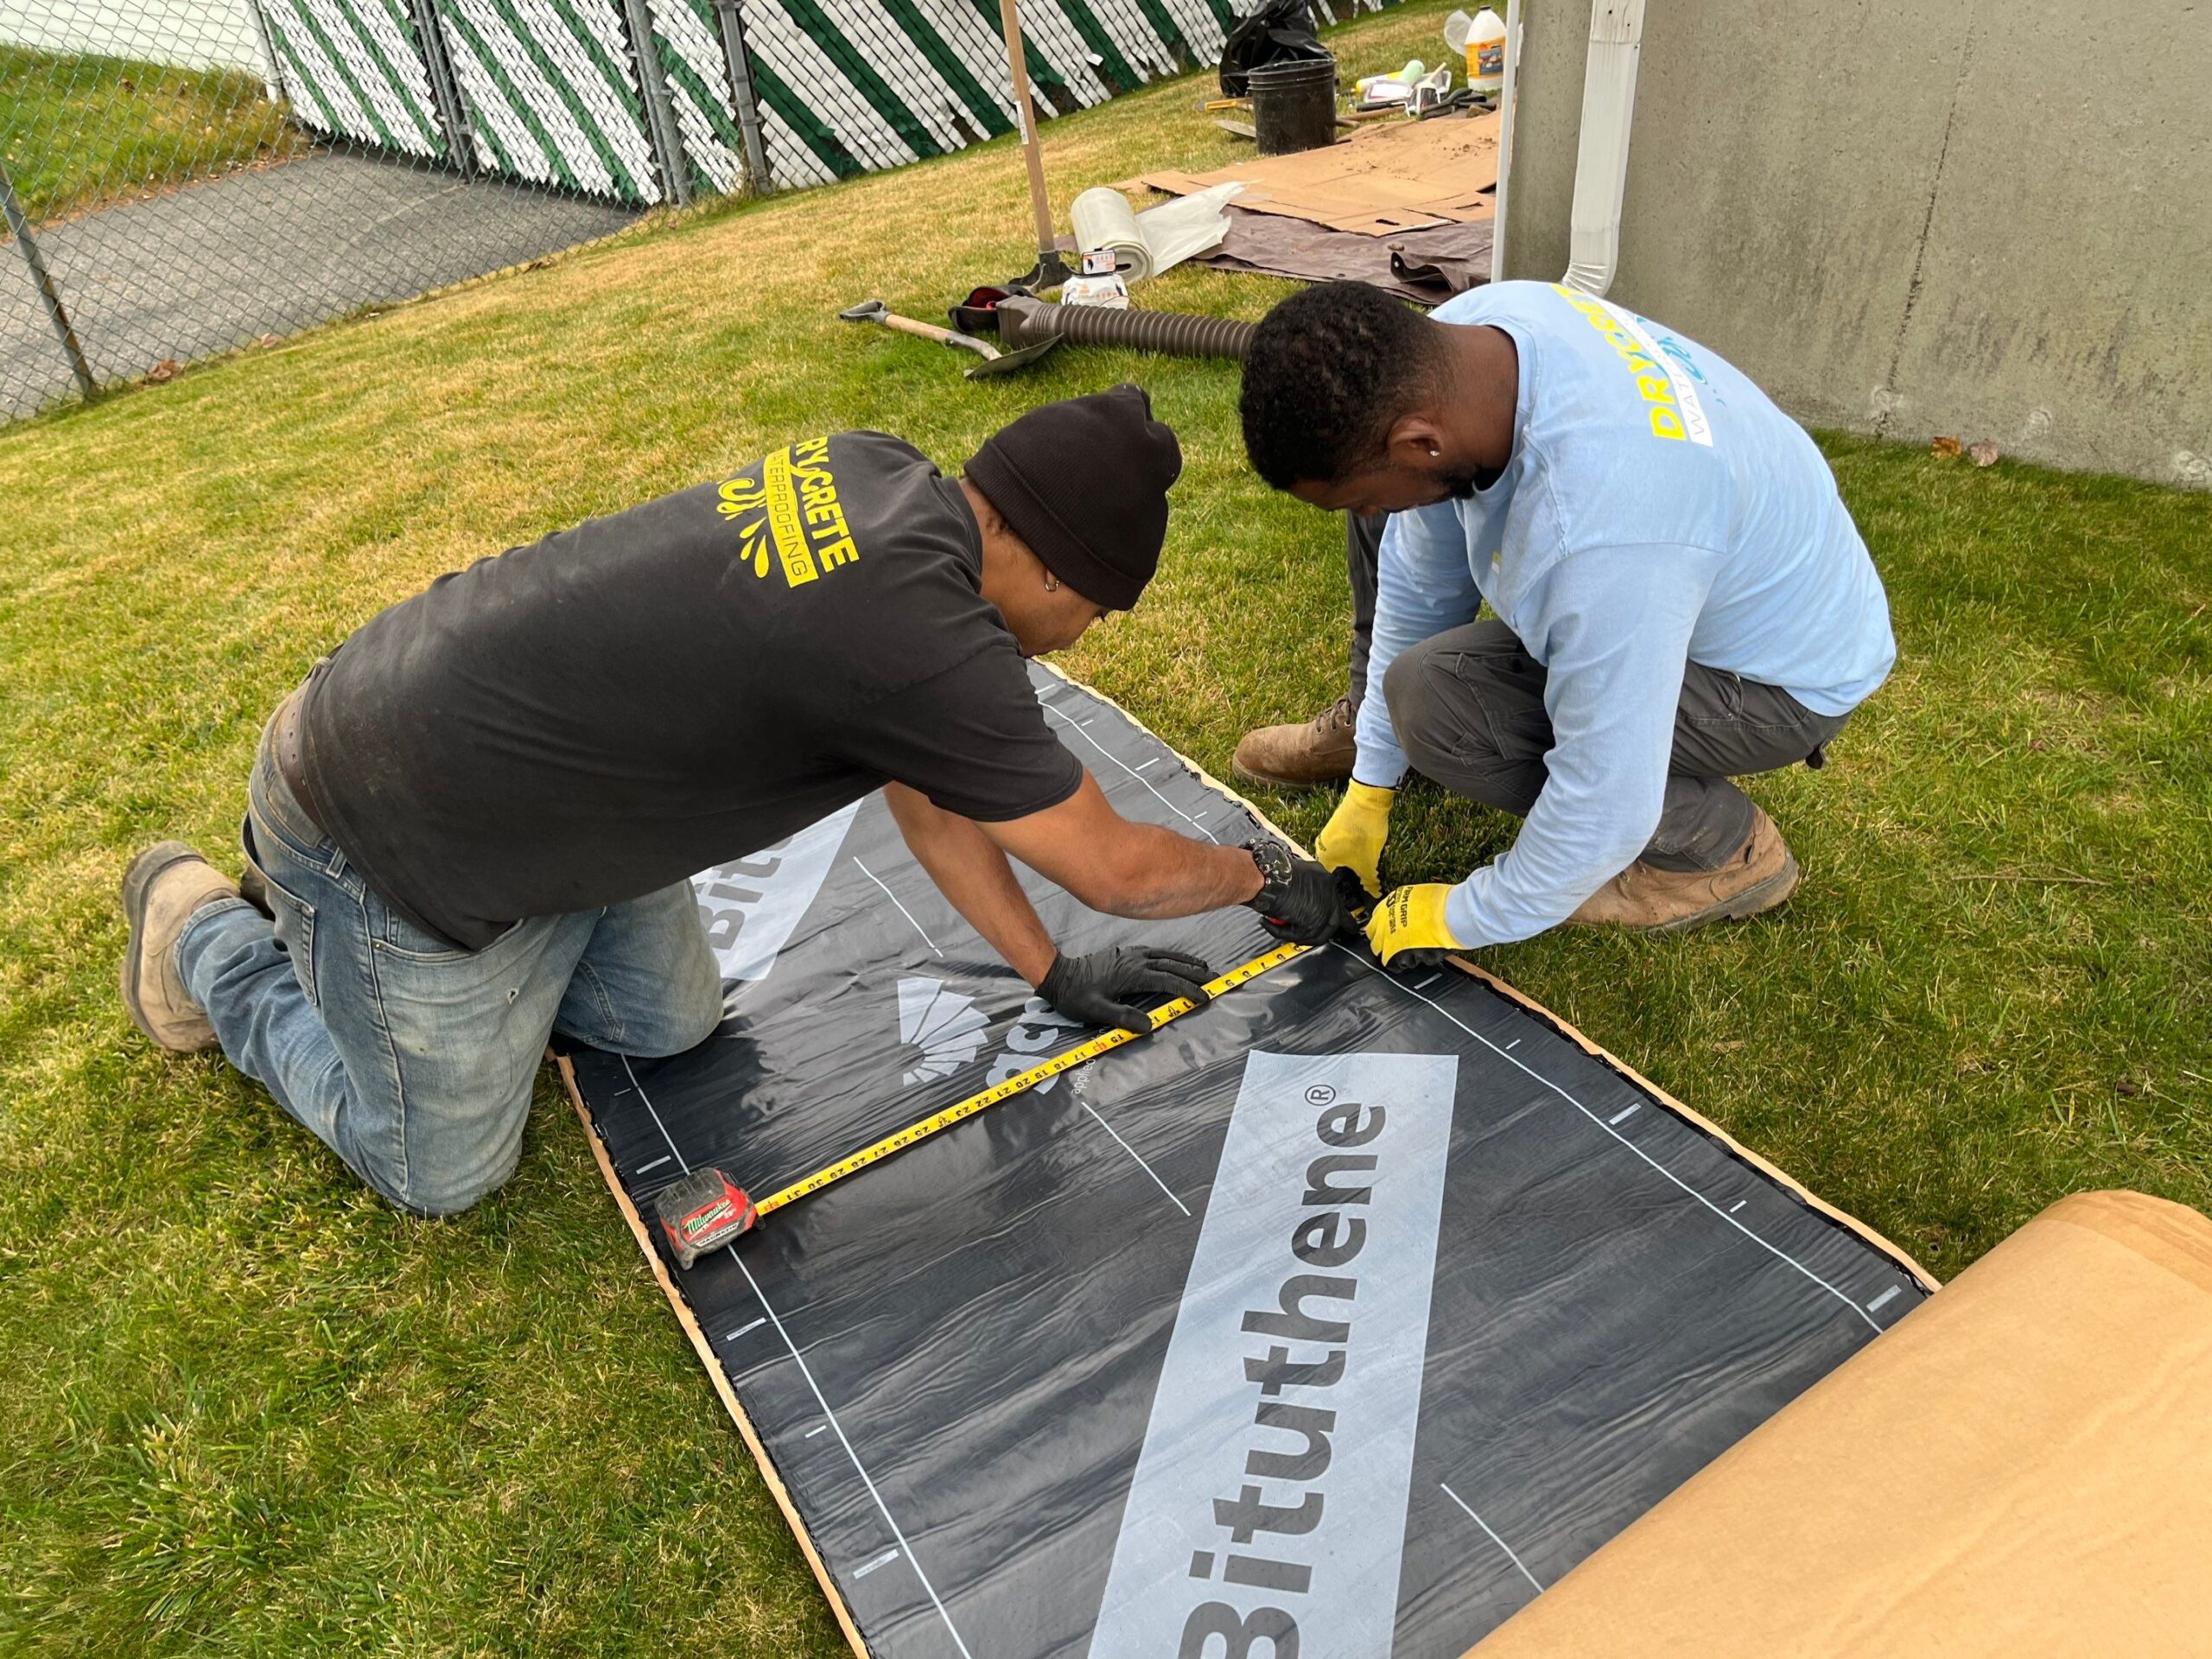
Sheet membranes are typically made of flexible, waterproof materials like rubber or asphalt based compounds and accomplishes the same goal as liquid membranes but in a more robust way.

Dimpled board is designed to allow air flow between your concrete wall and the soil surrounding. Water is able to run down the membrane into a drain system and way from your home.
Step 5: Install Window Wells
If your basement includes windows, properly installed window wells are an important part of the exterior waterproofing system. Poorly fitted or deteriorating window wells are a common source of basement leaks, especially during heavy rain or snowmelt.
To prevent this, new window wells should be installed as part of the waterproofing process. The well must be appropriately sized for the window opening and securely fastened to the foundation wall using bolts or anchors. This creates a controlled drainage area around each window and helps keep water from pooling against the foundation.
Step 6: Install a Drain System
If your home doesn’t already have a drainage system, this is the stage when it should be installed. Whether it’s an interior or exterior French drain, the purpose remains the same: to collect water that flows down the waterproofing membrane and direct it away from the foundation.
This drainage system plays a critical role in preventing water from accumulating along the base of your foundation. By channeling moisture toward a sump pump or designated discharge point, it helps reduce hydrostatic pressure and supports the overall effectiveness of the exterior waterproofing system.
Step 7: Backfill the Soil Around Your Foundation
After the waterproofing membrane and drainage system have been installed, the next step is to carefully backfill the soil around your foundation. This process must be done with caution to avoid damaging any part of the system, including the membrane, drain lines, and window wells.
Drainage material such as crushed stone is typically used to fill the space around and beneath each window well. This material should extend all the way to the footing, helping to prevent water from collecting in the well. It’s recommended to leave 6 to 8 inches of space between the top of the drainage layer and the bottom of the windowsill. A properly fitted window well cover should also be installed to keep debris out and reduce water intrusion.
Step 8: Finalize Landscaping and Downspout Extensions
The last, and often overlooked, step in exterior waterproofing is addressing landscaping and gutter drainage. Proper grading around the home ensures that water flows away from the foundation rather than toward it. Soil should slope gently outward to prevent surface water from pooling near the base of the house.
Downspouts also play a key role in water management. If gutter downspouts release water too close to the foundation, it can contribute to saturated soil and increased moisture levels. Installing downspout extensions to direct water farther away from the home will help protect the foundation and support the overall waterproofing system.
In Conclusion
Waterproofing house foundations from the outside is a detailed process that involves multiple critical steps. From excavating the soil and preparing the foundation walls, to making necessary repairs and applying a waterproofing membrane, each phase is essential to creating a durable barrier against water intrusion.
Installing window wells, setting up a proper drainage system, and carefully backfilling with the right materials all contribute to the success of the system. Finishing with proper grading and downspout extensions ensures long-term performance and reduces the risk of future water-related issues. Together, these steps help protect your basement from moisture, preserve the structural integrity of your foundation, and support the long-term health of your home.