There are few scarier sights than going down into your basement and discovering a giant crack in the wall. Not only are they unsightly, but they could also be a sign that something, somewhere, has gone seriously wrong. While not all cracks are made equal, you’re probably going to want to investigate and fix it. But where do you start and how to fix foundation cracks?
Identifying The Type And Severity Of The Crack
Your foundation walls are under a lot of pressure. The weight of your home and the surrounding soil pushing on them can force them out of shape and cause cracks. When these appear, it’s important to investigate and ascertain the severity of the problem. Once you’ve worked out what you’re facing, you can go about working out how to fix your foundation cracks.
There are three major types of cracks that appear in concrete walls:
Vertical Cracks
As the name suggests, these run upwards along your walls. They’re usually caused by your home settling into its foundations as the weight shifts slightly. Of all the different types of cracks they’re the most common and least worrying.
Horizontal Cracks
Cracks which run along the length of the wall, roughly perpendicular to the floor and ceiling. These are more worrying as they suggest pressure from the soil and water pushing on your walls.
Diagonal Cracks
Cracks that run diagonally downwards can be caused by settling or movement in your foundations. Settling isn’t generally something to worry about as long as the crack stays small. It’s important to get these properly checked.
Whichever type of crack you’re facing, you’ll need to assess the severity. Check them for:
- Width: Anything under 1/8th of an inch is probably ok, so long as it’s dry and not growing.
- Length: Unsurprisingly, longer is worse.
- Moisture: Water finding its way in is bad and will lead to problems getting worse.
- Growth over time: If the cracks are spreading or widening, that’s evidence of serious ongoing issues.
In any case, it’s important to keep an eye on your foundation walls. Early detection and intervention makes fixing foundation cracks easier and cheaper and avoids unnecessary damage.
Causes Of Foundation Wall Cracks
There are numerous potential causes of a crack appearing in your foundation, some more serious than others. Working out what the root cause might be is the next step in working out how to fix foundation cracks in your walls.
The most common causes are:
- Natural settlement: The normal process of a house sinking into its foundations. They generally appear in newer homes and aren’t necessarily alarming.
- Soil Movement: The soil around your home expands and contracts with moisture. This changes the pressure on your walls and can create cracks. Depending on severity, this might need intervention.
- Hydrostatic Pressure: If drainage is poor, the weight of water in the soil around your foundation can create cracks. This can be pretty serious if left unattended.
- Poor Construction: Unfortunately, there are plenty of homes out there which just weren’t built very well in the first place. It could be walls which were poured too thinly, the wrong blocks being used or the wrong techniques being employed. They can generally be put right, but depending on exactly what the issue is, it might be a bigger job.
DIY vs Professional Repair
Now that you’ve worked out what the cause of your problems are, it’s time to set about working out how to fix your foundation cracks.
There are some solutions that a keen DIYer could probably tackle themselves while others are best left to the pros.
DIY Solutions
For smaller, less serious cracks, you might be tempted to try and fix the problem yourself.
The most common DIY method for foundation wall repairs is injecting the crack with something to fill it. This might be epoxy or polyurethane. Whichever you go for the process is basically the same. First you clear out the crack, making sure that any debris is out of the way, drilling it out slightly. Then, you put a backer in place like hydraulic cement and inject your filler.
Professional Solutions
If the crack is bigger or otherwise more serious, or you’re just not comfortable tackling it yourself, calling in the pros is never a bad idea. They’ll have the knowledge, skills, tools and expertise to guarantee your cracks are sorted- with Drycrete, that’s a 10-year guarantee.
Our material of choice is DRY-SEAL 5000 or 6000. These resins are great for foundation crack repairs of all types. As they’re slightly less viscous than water, they penetrate deep into the walls, filling not only the main crack but the smaller capillaries which form in concrete. They also retain a certain level of elasticity as they cure, leaving room for your home to flex under pressure, avoiding the reappearance of cracks.
Of course, before a professional deals with the cracks themselves, they’ll make suggestions about the underlying problems which caused them. By dealing with drainage and waterproofing issues, you head off further problems down the line. This might involve installing various waterproofing methods, tailored to your home’s specific needs.
How To Repair A Foundation Wall Crack On Poured Concrete
Whether you opt for a DIY approach or call in the pros, the how of foundation crack repair follows a similar script:
Inspection and Assessment
First things first, we can’t work out how to fix foundation cracks without knowing what we’re dealing with. The primary step is a comprehensive inspection and assessing the results. The things we’re looking for here include:
- Width: Anything over 1/8th of an inch is a problem that needs sorting.
- Length: The shorter the better
- Growth: If the crack is growing in width or length, there’s an ongoing issue to deal with
- Moisture: A damp crack of any type is letting in water and that can lead to all kinds of problems.
It’s also a good idea to work out what the root cause is before you go about working out how to repair your foundation cracks. It may be that your waterproofing needs looking at too.
Preparation
Now that you know what you’re facing, it’s time to start the process of fixing it.
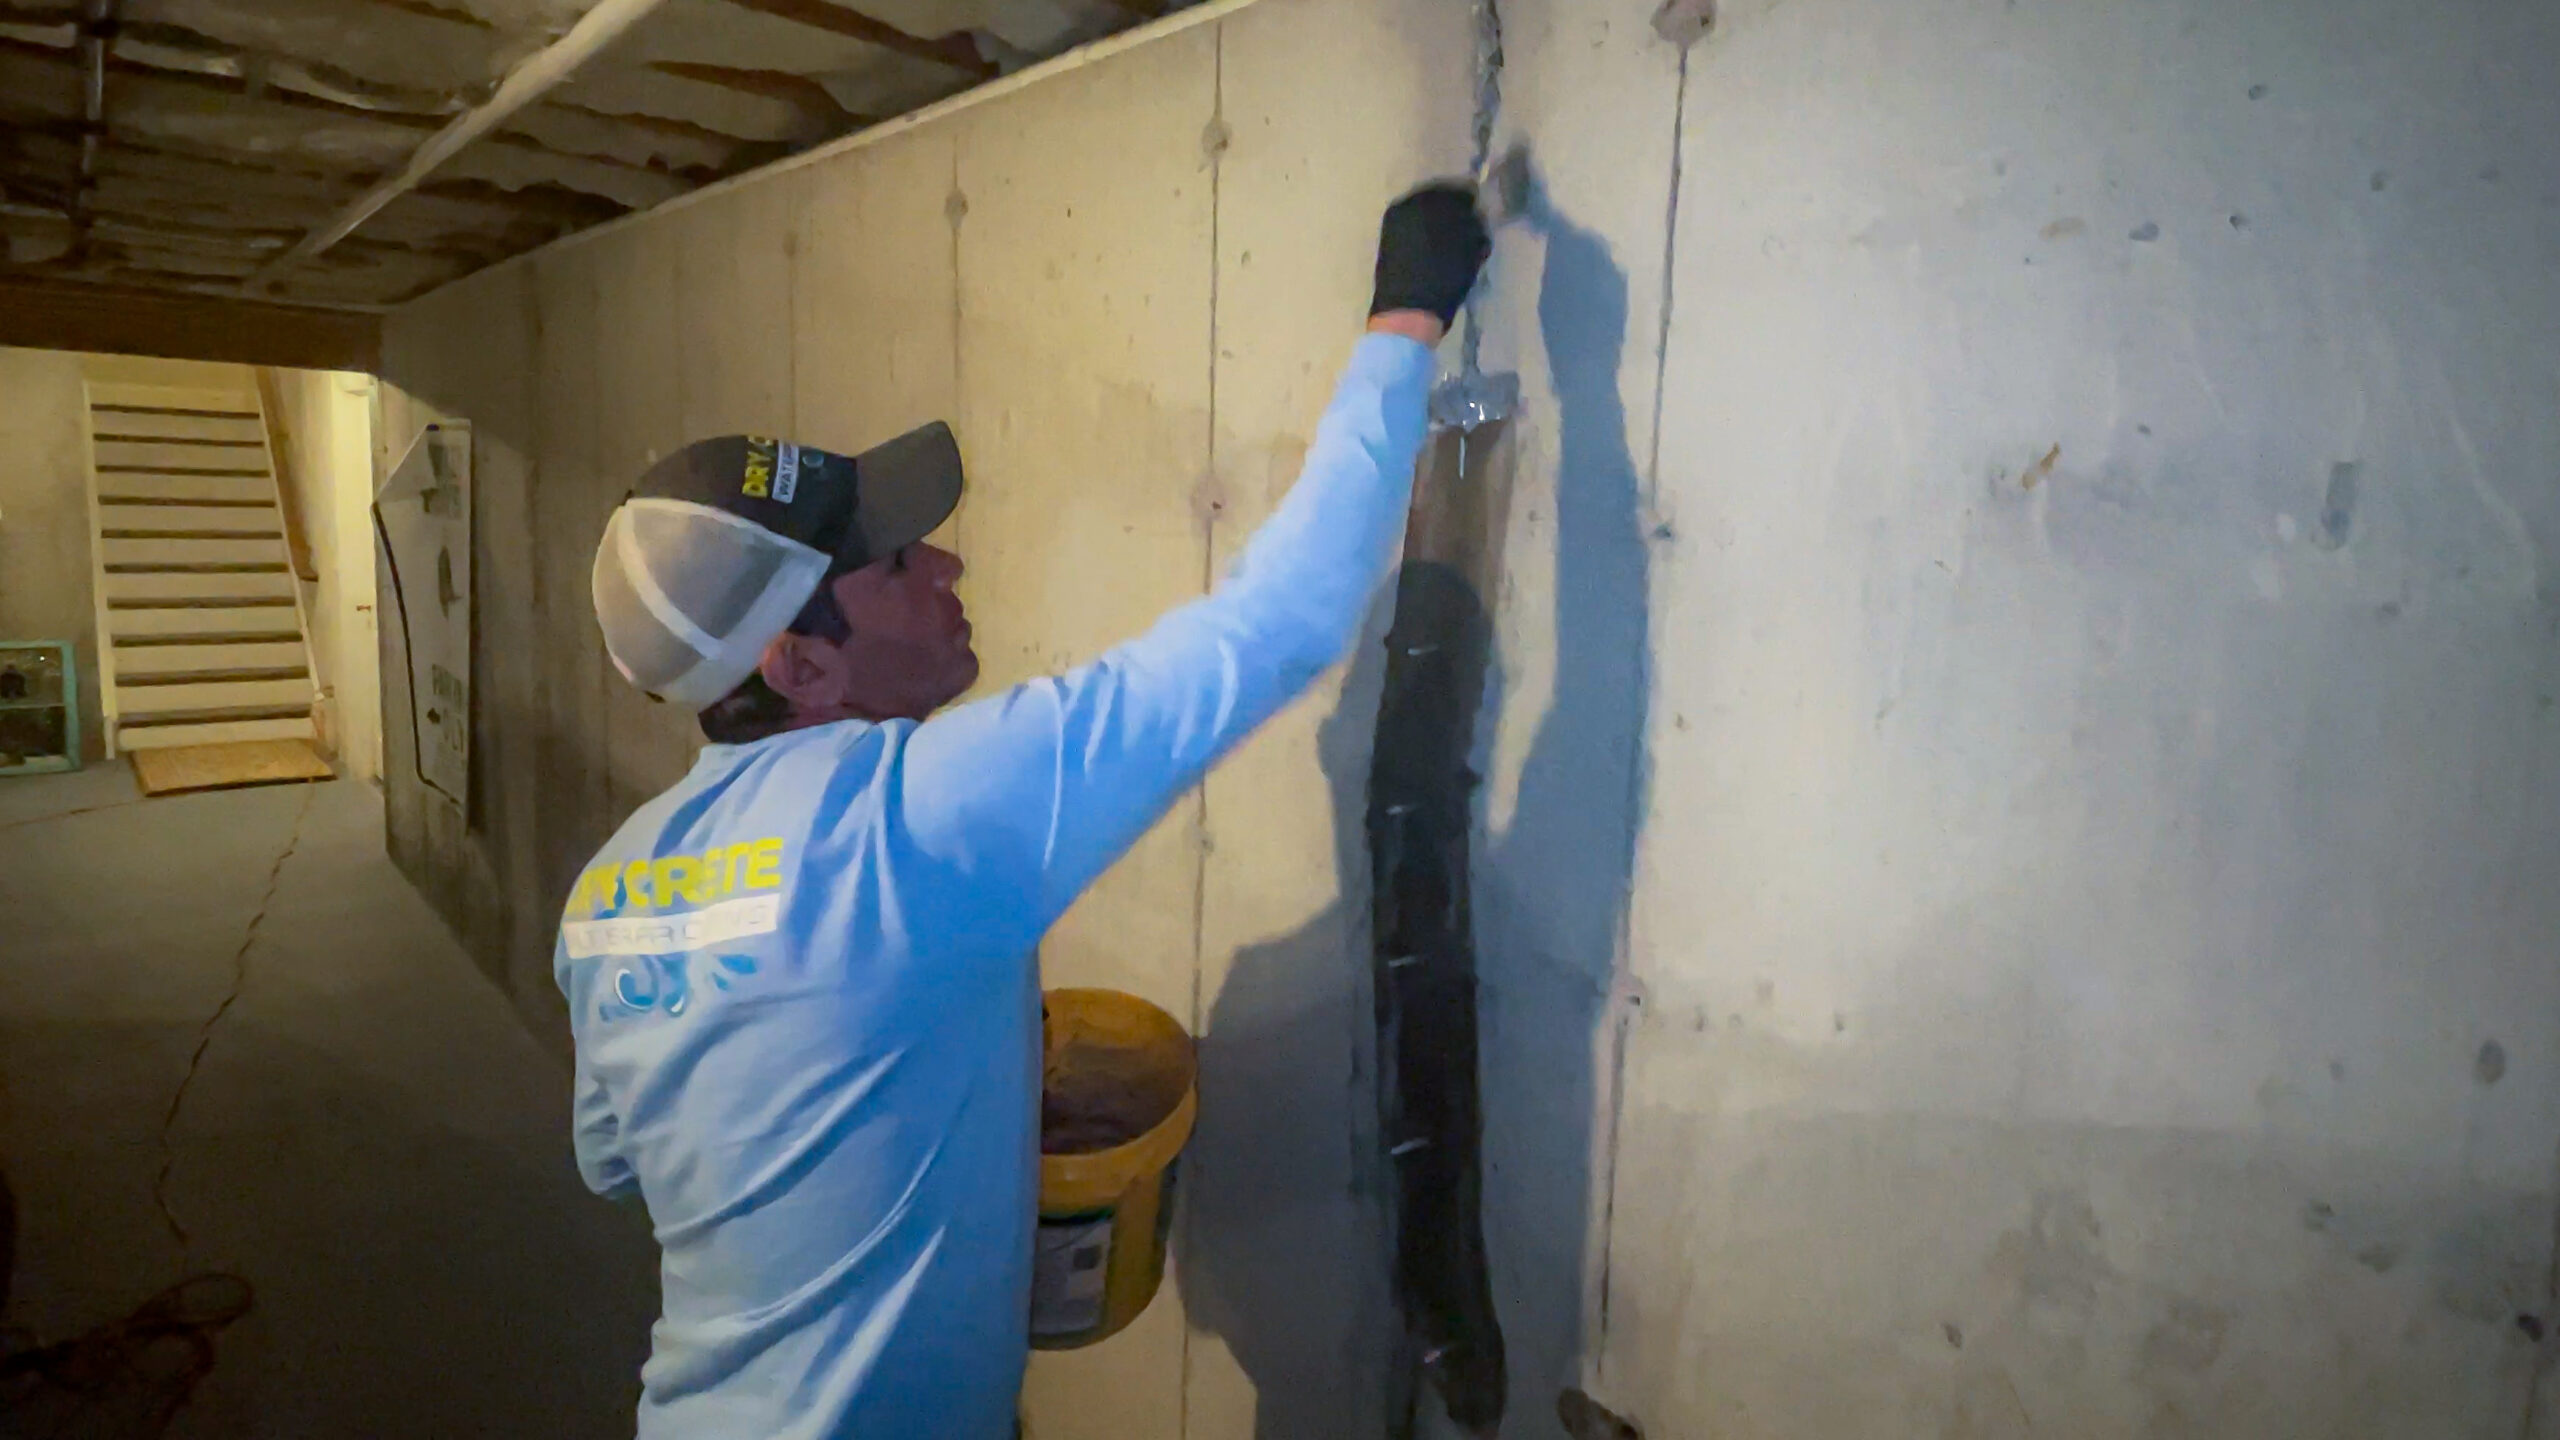
As with any task, the first thing to do is gather your materials and prepare the area. You’ll need to clear out the crack, using a chisel attachment for a drill and removing any loose material. Then the area will need to be thoroughly cleaned.
You will then need to drill port holes into the crack and install your ports. Hydraulic cement or epoxy should be added over the crack as backer to prevent any material from coming out of the crack.
Injection
The next step is the repair itself. The newly cleaned out crack will be injected using either epoxy, polyurethane or resins. This will mold itself into the shape of the crack, blocking it up and stopping water finding its way through.
Start at the bottom of the crack and work your way upwards. This allows the cleanest, neatest and most efficient final results. Work slowly and steadily and use as little pressure as possible to ensure that the crack is properly filled.
Maintaining A Crack Free Foundation
As with anything, prevention is always better than a cure. Even with the wonders of resin injection, it’s still better to not experience foundation cracks in the first place, though some are inevitable. The key thing you can do to avoid having to google “how to fix foundation cracks” is stay on top of your drainage and waterproofing.
Consider installing French drains and sump pumps and keep gutters and drains in good order. This will alleviate problems caused by water pooling against your foundations, avoiding cracks forming in the first place.
Keep a close eye on your foundations too as there are signs that problems may be forming before cracks appear. Look for white powder (efflorescence), musty smells and signs of dampness like mold and mildews. At the first sign of any of these, investigate and deal with the problem.